Life’s a little nuts right now, so rather than creating a new post, I’m re-running this post from October 20, 2017 in which I describe my workflow for a document I downloaded from the internet. Almost six years later, the process hasn’t really changed! For more detailed information on how I process digital documents, check out How I Do It: A Professional Organizer’s Genealogy Workflow, a 37-page downloadable pdf available for $19.99.
Last March, I wrote a post called My digital workflow that detailed what I do with a document I find on the Internet. (I never print it.) My digital workflow has not changed since then and it’s working out really well for me.
Last weekend, I did a talk at the St. Louis Genealogy Conference about going paperless and in my Powerpoint I included screenshots of the digital workflow and also a summary slide. The attendees asked for copies of the summary slide, so I decided to post it here.
The process is basically the same as my March post but I switched up the steps a little.
The example I used in my talk was my father’s uncle, Jay Ellis Adams (1914-2004). I had found his obituary online at the newspaper’s website. Here’s the workflow:
1. I click Print and, in the printer dialog box, Open in Preview (my Mac’s default pdf reader), which downloads the document to my computer. (If it had been a document at Ancestry, I would have clicked Save, then Save to My Computer.)
2. I immediately rename the file, using my file-naming protocol, which is Date Type of Document-Ancestor Name-Locality. I stick it into my Surnames folder, as a temporary holding place until I file it in step 6. I know that any unfiled documents in the Surnames folder require processing.
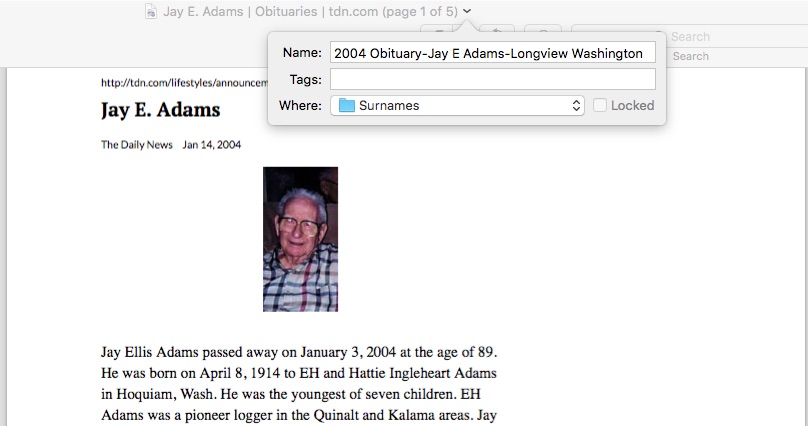
3. I select a fact from the document, add it to Reunion and create a source citation for it.
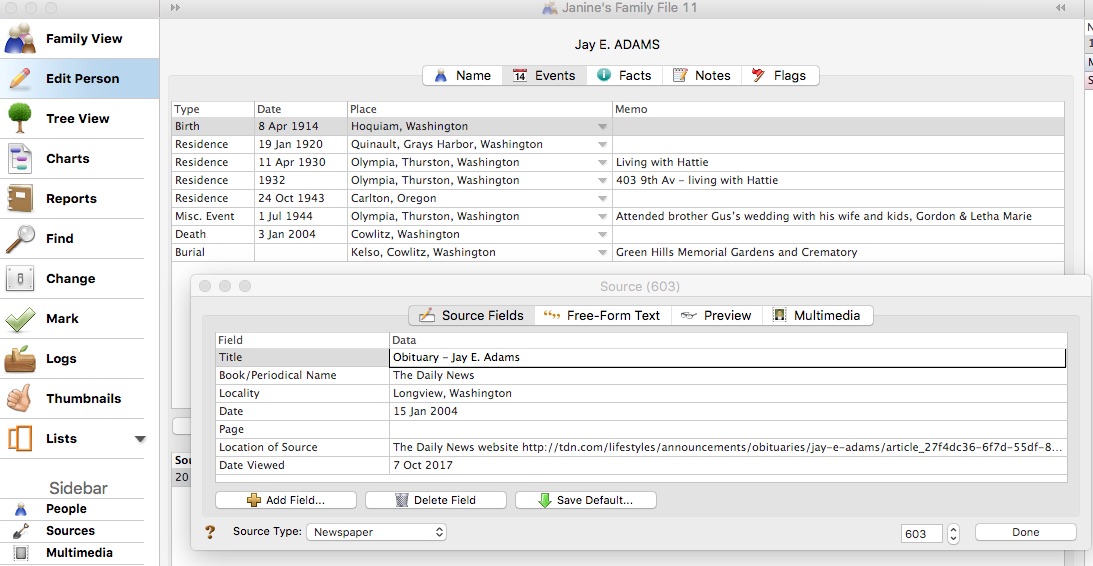
4. In Reunion, I click the Preview tab in the source record and then click Copy Source. (For the eagle-eyes among you, I originally found a transcript at Genealogy Bank and used that as the source citation. Then I decided to go to the newspaper’s website and download it from there, so I changed the source citation. But I was too lazy to take a new screenshot.)

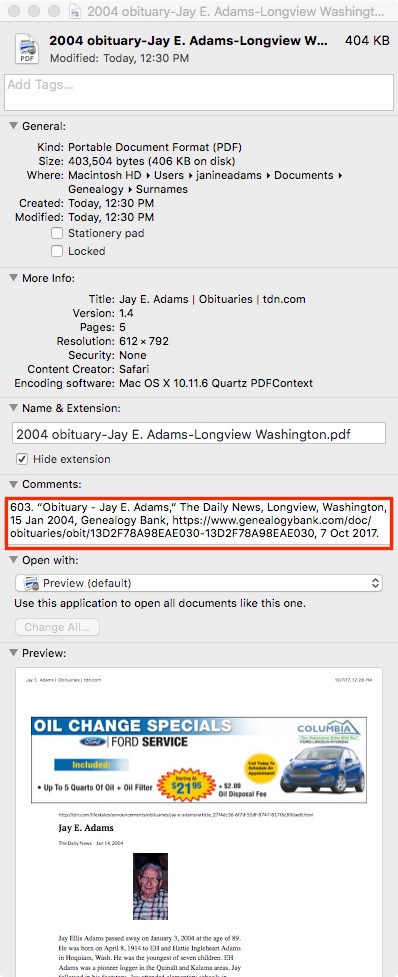
5. I paste the source citation into the metadata of the source document (the obituary) by Ctrl-clicking on the file and selecting Get Info from the menu that appears, then pasting into the Comments area.
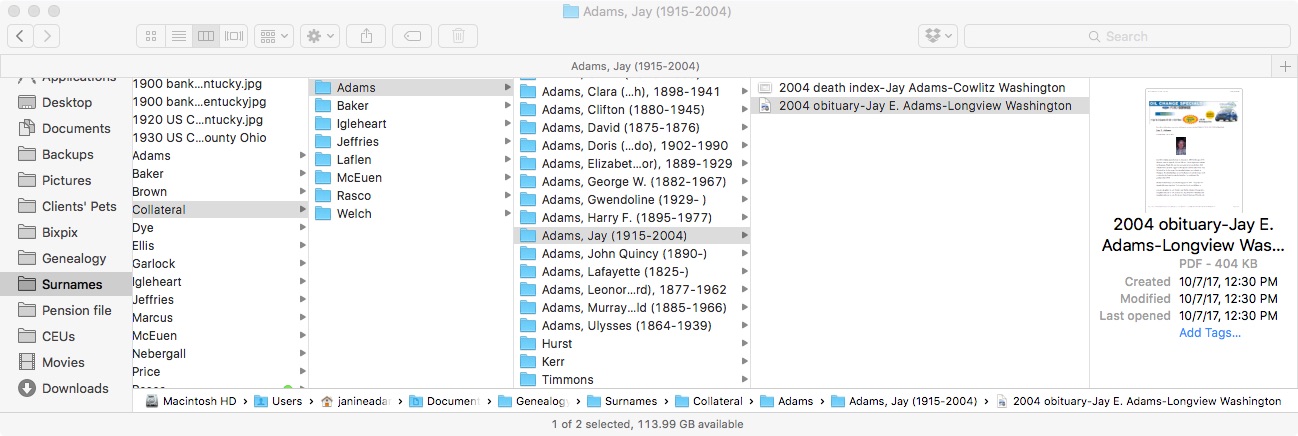
6. Then I file the document into my folder structure. My folder structure for collateral relatives is Genealogy/Surnames/Collateral/[Surname]/[Name of Ancestor (YOB-YOD)]. If the document applies to multiple people, I duplicate it for each person and then drag it into the appropriate folder for each person. But I don’t take the trouble to rename it.
7. The final step is to drag the document into the Multimedia area of the source record in Reunion. This creates a link to the document so that I can open it up inside Reunion, which is very handy.

From there, I continue to extract information from the source document and add that it to Reunion. Every piece of information I glean from a single source document uses the same source number, no matter what person it applies to.
Here’s the summary slide:
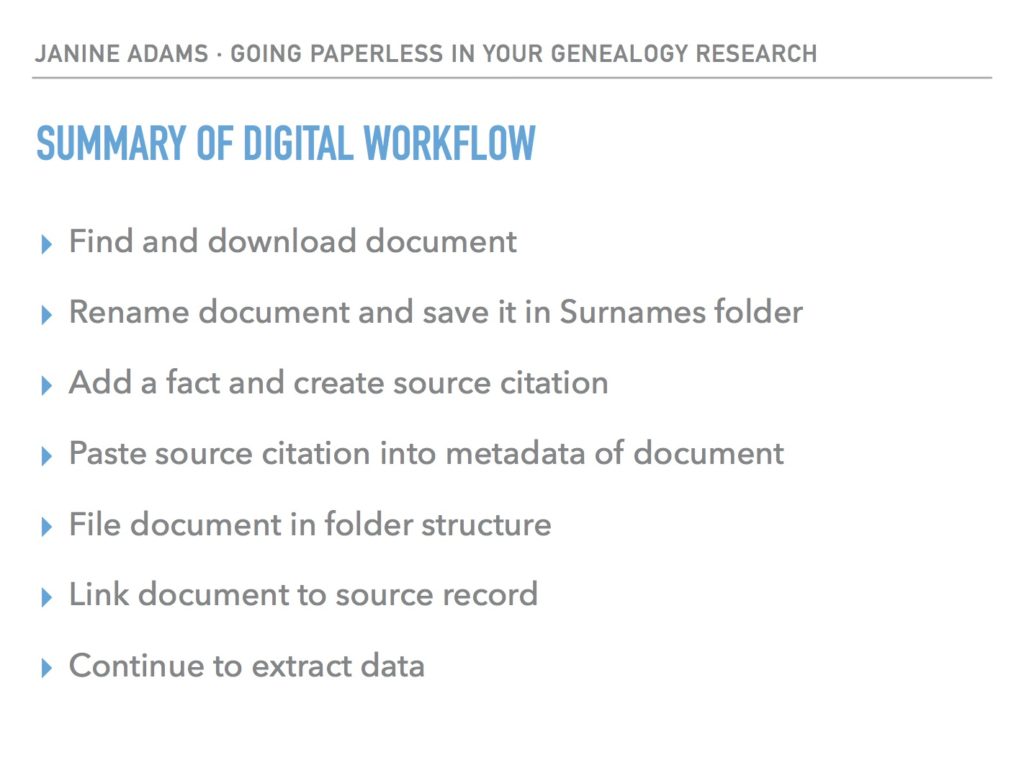
This is the way I do and it works well for me. Of course, it’s not the only way to do it or perhaps the best way to do it. But I’m hoping you’ll find it useful to see my workflow. I’ve been processing documents this way for almost a year now and it’s working very well.
Again, for more in-depth information on how I organize my own genealogy, check out How I Do It: A Professional Organizer’s Genealogy Workflow, a 37-page downloadable pdf available for $19.99.

Thanks, Janine. It’s interesting to see your excellent method in your slides, which make it very clear (and show how the method can induce peace of mind). Like you, I use Reunion and Preview on my Mac, and it’s always fascinating to see how people do essentially the same steps with the same tools but differently.
Occasionally I use Legacy on a Windows machine, and your method transfers well to that–and probably to most genealogy packages.
A while ago I took to heart your idea (from your March or earlier blogs?) of putting an image’s source citation into its metadata, but I’ve worried about whether that survives a transfer to, say, the Gallery in my Ancestry tree, or a download from there to someone else’s computer, maybe a Windows computer. And will it continue to work next year?
Therefore, lately I’ve been using the Preview application’s Markup feature to place a line of text on the image itself to show the source. It’s usually pretty terse, like “Dayton (Ohio) Daily News, Thurs., 3 March 1943, p.12, col.4” or “Fayette Co OH will book 3, pp.127-8, FHL microfilm 238942.” Sometimes there isn’t much space to do that on the image without messing it up, but a lot of online images of old documents have some empty space at the edges where I can squeeze in a line of text. On Windows, the Paint application can annotate images.
When it’s available, I select the electronic text of an obituary or story, then copy and paste it into the Free-Form Text tab of my source definition in Reunion, so it will ride along in a Gedcom transfer of my database, in case the image doesn’t. Sometimes when I find a portrait with an obituary, I use the Screenshot application to “clip it out” and save it as a PNG or JPG (TIFF for a high quality image), then attach it to the person’s Reunion profile. I’ve used the built-in Snipping Tool application on Windows for the same purpose.
By the way, have you noticed? The obituaries at funeral home web sites often have more extensive obituaries than people can afford to place in newspapers these days.
As usual, I’ve blathered on about this. Feel free to cut whatever part of it you’d like.
Marian, thanks so much for adding that valuable information. I,too, worry that the metadata won’t transfer but (so far) have been unwilling to take the extra effort to use Markup to add more information. It’s helpful for me in my own research to put the source citation into the metadata and that’s enough for me at the moment.
That’s a great idea to copy that electronic text Devon obituary into freeform tab in the source record in Reunion. I, too, will use Screenshot to capture photos and gravemarkers and I save them along with the rest of the documents in the person’s folder. And I create a source citation for them.
I so appreciate the contributions you make in your comments to my posts!
This past week has been a busy one for me, too, and am just now getting to read your post. It is timely as I’ve [again] started to digitize my paper files. I also use a Mac and your presentation and explanation is helping me to learn how to download files directly instead of printing them out then scanning them before saving. After reading through your post this time, and being so motivated, I think your process will “stick” in my brain this time.
Zenda
Zenda, I somehow missed your comment until now. I’m so glad you found the post helpful. Life is definitely easier when you skip the printing! Good luck with your digitizing.