• BLOG
  • ABOUT
    • Privacy Policy

Organize Your Family History

Stay focused and happy while exploring your roots

Getting started going digital

November 26, 2021 By Janine Adams 10 Comments

If you’ve been pondering transitioning to digital organization of your genealogy records, you may be stymied about how to get started. It can feel overwhelming and perfectionism might be paralyzing you.

If you’ve been reading this blog for awhile, you know that I’m almost completely paperless in my genealogy research. I started out printing and filing everything but transitioned over a few years to digital. I didn’t make a decision to go paperless on a certain date. Rather, once I had a trustworthy digital folder structure and file-naming protocol in place, I didn’t feel like I needed to print anything out. I’m lucky, in a way. I came to this after just a couple of years of serious research. So I didn’t have a huge backlog to contend with.

I get a good number of questions from folks who have been researching for years and have a whole of lot paper to show for it. They want to go digital but don’t know where to start digitizing their research. If that’s something you think about, here’s a post designed to help you get started.

Here’s what I recommend as the first steps to organizing your genealogy research digitally.

  1. Create a folder structure and a file-naming protocol. This is critical so you easily find your documents. I describe my folder structure and file-naming protocol in step six of this blog post.
  2. From this point forward, stop printing and start downloading documents you find online, using your new folder structure and file-naming protocol. If you start now, you’ll familiarize yourself with your the new file system and you won’t add to your backlog of documents to be scanned and filed.
  3. Start scanning, renaming and filing your paper documents. What I did was go through my paper file folders, which were organized by couple, one by one, evaluating each piece of paper and scanning documents any that I didn’t already have in electronic form. I blogged about it in a post called Marrying my electronic and paper files. This may sound tedious, but I urge you to think about this as an opportunity to check your research. Looking at each paper, you may come across evidence that you overlooked when you first filed those papers. Here’s the good news: you don’t have to take a vacation to get it done. You can do it little by little, person by person or couple by couple (depending on how your paper documents are organized).
  4. Recycle or shred paper after you scan it. I see no reason to hang onto the paper files you have scanned, unless they have some historical value. For example, after I carefully scanned it, I kept the epic handwritten letter my grandfather wrote my grandmother before they married.
  5. If you find yourself pulling a paper document out of your files to help you in your current research, go ahead and scan and file it electronically. Then toss the paper.
  6. It should go without saying, but I’ll say it anyway. If you’re organizing your genealogy research digitally it’s imperative that you have a routine in place for backing up your hard drive. (Look no further than my recent experience of my backup saving my bacon when my computer died without warning.) It’s a good idea to have more than one back up.

This process reminds me of that age-old question: “How do you eat an elephant?” One bite at a time. Once you get your folder structure and file-naming protocol set up, you just take it paper by paper. Acknowledge that it will take awhile. Recognize the value of going through your old papers. And keep your eye on the prize: An easily accessible, readable and sharable archive of your genealogy records.

For detailed information on the digital organizing system I created for my research, check out my 2021 Orderly Roots Guide, How I Do It: A Professional Organizer’s Genealogy Workflow. The downloadable pdf is 37 pages and available for $19.99.

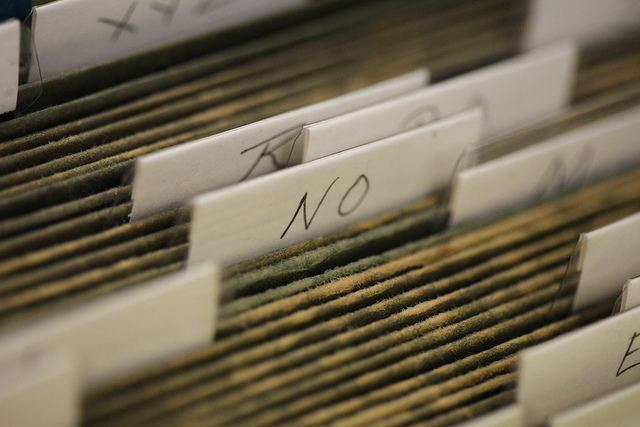
Photo by Tom Woodward via Flickr. Used under Creative Commons License.

Filed Under: Challenges, Genealogy tips, Organizing, Technology Tagged With: electronic files, organizing aids, paper files, record keeping, technology

The fun of mapping your ancestors

November 19, 2021 By Janine Adams 9 Comments

Today I decided to focus on my ancestor map, the wall-mounted map of the U.S. on which I’ve placed pins indicating the birth and death places of four generations of my ancestors (from my parents to great great grandparents). I started it back in 2013, but it had been awhile since I did anything with the map (beyond enjoying looking at it).

Today I opened the little spreadsheet where I had checked off the ancestors (direct-line only) I had already pinned. Going through it, I identified six pins I could add because I’d found more information (yay!) and four specific birth or death places I need to identify. I created and pinned those six and made a check list of the blanks I need to fill in. Once I find that info and complete this generation (or decide I don’t want to wait), I’ll start adding the next generation.

I think the genealogy map is so fun and valuable, I wanted re-run the post I wrote about it in 2017. I hope it inspires you to perhaps give it a try!

Four years ago (time flies!) I posted about how I created an ancestor map so that I could place pins on the map where my ancestors were born and died. I was proud of my DIY efforts. But I’m sorry to report that it turns out my DIY skills are lacking. Over time, the edges of the map pulled out of the frame so that pretty much all that was keeping the map in the frame were the pins. It made me sad when I looked at it and I stopped adding pins. I didn’t take it down, though, because I kept hoping I’d figure out a way to fix it.

Fast forward several years and I noticed in an organizing client’s home the exact same map in a nice frame. The map was held firmly in place and looked great. I asked her where she got it and whether she had purchased the frame with the map already in it. She had, and she sent me an Amazon link to the map.

I decided to go ahead and replace my sad map with a new and improved version. It cost about $78 but to me it’s worth it because it makes me happy, not sad, when I look at it!

I removed all the pins from the old map and put up the new map in its place, using Command hooks. Then I set to work putting the pins back up. I counted the work toward my 30 minutes of genealogy research that day, and in my research log (yay, me!) I wrote:

“The process was really fun because it was like a quiz. I’d draw a pin with a flag on it with the name of an ancestor and since I wanted to find them in my tree, without searching, I needed to know what line they came from. I also made a game of trying to get to that with the fewest clicks within my tree. Then I tried to guess the locality. And, of course, I had to find the locality on the (not very detailed) map, using Google maps for guidance.”

The process pointed out some holes in my data in my tree—death vs burial places for example; and birth places for which I had only a state. It also pointed to the fact that I’d filled in quite a few holes since I first put together the pin labels, even though the map pins go back no further than my great great grandparents (and not even all of those). I decided to add pins for burial places when they differed from death places, so in addition to replacing the pins that were on the map I added 11 pins.

I love seeing the clusters of pins on my map (in Alabama, Kentucky, Missouri and Washington primarily). I’ve color-coded the pins by family line and you can see that the lines converged in Pacific Northwest, where my father and his father (and I) were born and where my mother moved from Missouri at the age of three.

Here are a couple of more detailed photos of my clusters. (For those who notice such things,  I had to use a different font for the labels I added recently because I lost the old font when I upgraded my computer.)

It’s been a fun exercise and I’m looking forward to adding more pins to my map!

Filed Under: My family Tagged With: excitement, maps, organizing aids

Going through my box of inherited items: step two

October 5, 2021 By Janine Adams Leave a Comment

In August, I blogged about taking the first step to process a box of inherited items. I’m using the process I learned from Stacy Julian in her terrific RootsTech talk last year (you can read all about it in her blog post How to BEGIN with the BOX). Her process allows you get started on something that can feel very overwhelming.

I promised that when I took step two, I would post about it.

According to Stacy’s methodology, step two (after sorting the contents of the box into categories in step one) is to go through the items in a category and assess the value of each item, then note the needed actions. Here’s the secret sauce of the whole thing: You put the items that you most want to take action on–the most interesting or thrilling or beneficial finds–and put them in an Action file. And you’re allowed to have no more than 10 items in the Action file. Once you have that many items, you stop the assessment process and take action.

I want to take a moment to say how brilliant I think that is. Since you put the best stuff in the Action file and limit the number you can put there, then the Action file pretty much only contains stuff you really want to do. And there’s a built-in trigger (10 items) to get started taking action. Stacy says in her blog post that you should follow your heart and intuition in terms of deciding what goes into the Action file.

So in my efforts, I immediately gravitated to the Written Stuff file, as opposed to the Picture Stuff. That’s just my nature. I found a 50th anniversary card (pictured at the top of this post) from my mother’s brother with a snarky inscription that was so typical of my Uncle Joe. You can click on the image to see it larger, but I’ll tell you that the inscription says, “So you made it to 50 years!! Gene, I admire your tenacity. Happy anniv. Love, Joe”. I scanned the card and sent it to his kids.

Among the Written Stuff were some old newspaper clippings that were fun, though of little genealogical value, including one that shows the new jackets of the Yakima (Washington) High School basketball team circa 1949, with basketball players, including my father, Gene Adams (who is 91!), modeling them. I decided to scan the clipping and email it to my brother (who is a big fan of sports uniforms) and then put it aside to take to my father when I see him later this month.

Here’s that clipping. My dad is second from left.

I just kept going through the stuff, noting the actions and putting some of them in the Action folder. I actually ended up taking action on all the Written Stuff (I don’t think there were even 10 items) because when I started looking at the Picture Stuff I got overwhelmed.

I’m feeling great about the Written Stuff and will systematically start going through the Picture Stuff. Since the photos overwhelm me, I know that I will benefit from using Stacy’s methodology and I know that a timer will be my best friend. I’ll work on it just 10 or 15 minutes at a time. When I get finished, I’ll post again!


Filed Under: Challenges, Excitement, My family, Organizing, Preservation Tagged With: family photos, organizing aids, overwhelm, paper files, resources, Stacy Julian

Going through my box of inherited items: step one

August 24, 2021 By Janine Adams 6 Comments

On November 13, 2020 I wrote these words in a blog post about Stacy Julian’s method for going through a box of family photos, documents and memorabilia.

“When I drove to Walla Walla in September, I took the opportunity to bring home a box of family stuff. It’s not so much documents as photos, but I intend to use Stacy’s framework as I go through it.”

Nine months later, I finally opened that box this past weekend. I was excited to use Stacy’s method, which I had first heard about in her terrific 2020 RootsTech presentation. I decided to go through each of Stacy’s five steps and blog about each step after I finished it.

The first step is to sort the contents of the box into five categories:

  1. Picture Stuff
  2. Written Stuff
  3. Document Stuff
  4. Memorabilia Stuff
  5. Dimensional Stuff

I had an unused Elfa rolling  file cart and I rolled it to my workspace. I used sticky notes to label the folders. Here’s how it looked right before I started sorting:

It took me only 30 minutes to sort the entire contents of the box. As I had expected, the box contained primarily photos. I was able to tell by the handwriting on the back of many of them that at least some of the contents of the box had come from my grandmother, Susie Jeffries Brown, after she passed away in 1999. It was so touching to handle these items and remember my grandmother. (Today is my grandmother’s birthday! She was born 24 Aug 1908.) Some of the photos were framed in paper folders or wood or metal frames and I created a second Picture Stuff folder to contain those.

In addition to photos, there were some newspaper articles, as well as some other written items, including my parents’ wedding vows. (Those went into Written Stuff folder.) There were a few books, including an illustrated edition of Aesop’s Fables that had been given to my grandfather, Crawford Brown (1906-1996) in 1914. It was a Christmas gift from his grandmother, Antoinette Garlock Brown (1855-1922).

There was also a collection of the embroidery pieces I created as a kid and gave to my grandmother. She had framed them and hung them on the wall of the apartment she shared with my grandfather in their retirement home. (How sweet is that?) That’s a photo of one of them at the top of the post. The Elfa file cart has two drawers on the bottom and I ended up using both of them to hold all the dimensional stuff.

I worked hard not to spend a lot of time on individual items. The goal was to simply sort them to make them accessible. And it felt great. I can’t wait to dig in to the individual pieces.

In the next step, I will take a closer look at each document and assess value and usefulness of each item, according to Stacy’s methodology, which is detailed in her post, How to BEGIN with the BOX, on StacyJulian.com. I’ll blog about step two as soon as I finish it!

Here’s my post on step two!

Filed Under: Challenges, Excitement, My family, Organizing, Preservation Tagged With: Brown, family photos, Jeffries, organizing aids, overwhelm, paper files, resources, Stacy Julian

  • « Go to Previous Page
  • Page 1
  • Interim pages omitted …
  • Page 6
  • Page 7
  • Page 8
  • Page 9
  • Page 10
  • Interim pages omitted …
  • Page 43
  • Go to Next Page »

about me

I'm Janine Adams, a professional organizer and a genealogy enthusiast. I love doing family history research, but I find it's very easy for me to get overwhelmed and not know where to turn next. So I'm working hard to stay organized and feel in control as I grow my family tree.

In this blog, I share my discoveries and explorations, along with my organizing challenges (and solutions). I hope by sharing what I learn along the way I'll be able to help you stay focused and have fun while you do your research, too.

tags

30 x 30 Adams amy johnson crow anniversary Brown cemetery census Civil War conferences connections dna electronic files Evernote excitement Family Curator family photos genealogy tools getting started goals How They Do It Igleheart Jeffries keepsakes learning opportunities maps newspapers NGS organizing aids overwhelm paper files planning quick tips rasco record keeping research research log research trip resources RootsTech social history source documentation Stacy Julian technology time management vital records

join the facebook community!

join the facebook community!

My organizing business

Learn more about my organizing business, Peace of Mind Organizing®.

Subscribe by RSS

  • RSS - Posts
  • RSS - Comments

© 2026 Janine Adams


Loading Comments...