 Very little paper comes into my genealogy life since do almost all my research online. But in 2022 I cleaned out my parents’ home (they have both passed away) as well as my aunt’s (she’s in a nursing home) so I have some paper to think about. I wrote about this last year and in reviewing that post, I thought it valuable enough to run again. My feelings on the matter have not changed in the intervening year and a half!
I do most of my research online, so this hasn’t come up a lot. But this week I’m going through documents that had lived in my parents’ home and my aunt’s home and some of them are original vital records. I did my first group of ten a couple of days ago and scanned and processed them. And then I had to decide what to do with the originals.
This morning I went through the little stack one by one and followed my gut about those I wanted to file into the paper files I have left over from before I processed everything digitally and those I would feel comfortable discarding.
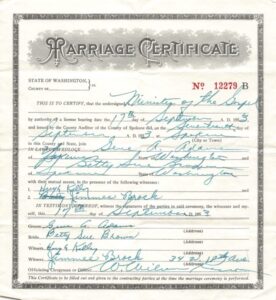
In truth, I could discard any of them, since I’ve captured the images. But my gut tells me to hang on to those documents that have original writing or signatures. An example is my parents’ marriage certificate, shown above. They were married by father’s uncle and I think he filled out the form. I don’t have a good, logical reason for this decision. It just feels right because these documents feel special. I have the space in my file cart and the files are already created, so it will be a simple matter to file them. If I have to create a new file folder label and put it on a folder to file something, I might feel like more trouble than it’s worth.
This is a matter of personal preference and I understand that my preferences might change. (And you may have a completely different preference.) If I end up with a lot more and it feels too laborious, I may revisit this criterion!


