• BLOG
  • ABOUT
    • Privacy Policy
  • CONTACT

Organize Your Family History

Stay focused and happy while exploring your roots

Backing up Evernote on a Mac (updated)

November 28, 2017 By Janine Adams 4 Comments

I like storing important files on my hard drive, not in the cloud. Call it unreasonable, but I have a distrust of the cloud. Yet I love Evernote, the cloud-based note-taking and information storing app. In fact I depend on it for many facets of my personal, business, and genealogy lives. So I was thrilled when reader Corbin Dodge, J.D., was kind enough to spell out instructions for backing up Evernote to your hard drive, after I expressed my fear of what would happen if Evernote vanished, in a comment on my blog post How I store my genealogy information. I went through all the steps of Corbin’s clear and detailed instructions and now have such peace of mind knowing that my notes are safe and easily accessible outside of the Evernote app. (I back up my hard drive to an external hard drive and to the cloud.) I didn’t want this valuable information to remain buried in the comments, so Corbin has graciously agreed to let me reprint them here. [Note: Evernote issued an update which changed the way the backup is created. This post has been updated to include the new instructions.]

I share your concerns re: what if an app goes belly up (what nightmares are made of!).

One thing I admire about Evernote is that it is easy to backup your notes so they’re accessible even if the app goes away. To do this on Mac:

(1) select the “Notes” heading in the sidebar

(2) On mac, hold down the command key and the “A” key at the same time, which will select all notes (on PC, hold down the control key and the “A” key at the same time)
(3) On the main menu bar, click “File”, then select “Export notes…”
(4) A window will pop up. There is a drop-down box labeled “Format”. It gives you 2 options. Choose “HTML”
(5) Save*

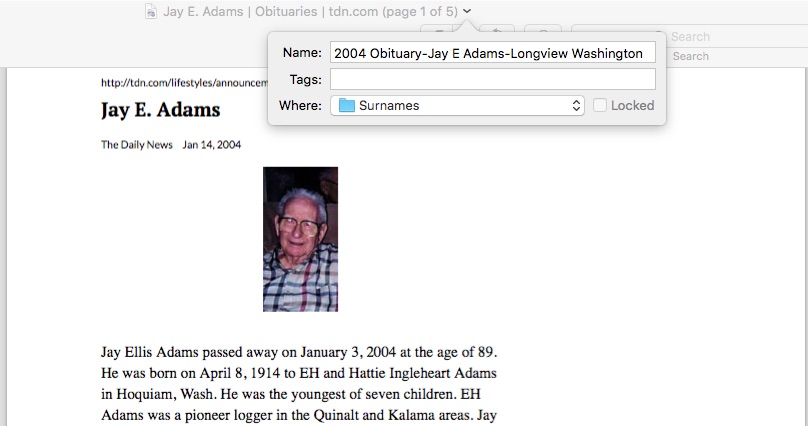
To access the backups, click on any note in the folder. It will open in your default browser. You can backspace out the note name in the url to get the full table of contents of every note that was backed up. Not as smooth to browse as the app, but reassuring to know your notes are accessible even if Evernote goes away! It also saves the images, albeit as a separate image file

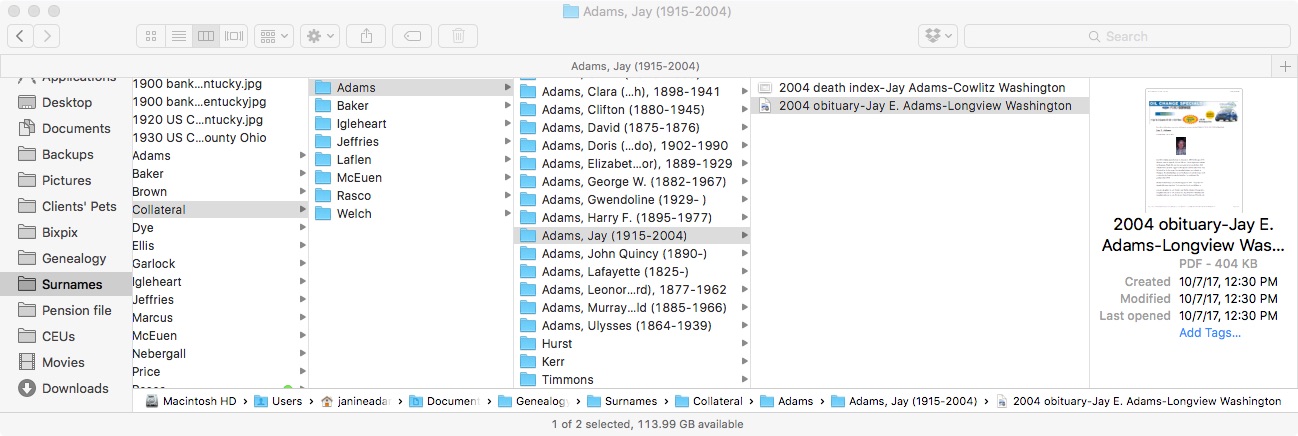
*I’ve found this folder structure works well to organize backups for my various apps:
Dropbox / Backups / Evernote / 2017-09-27 Evernote Backup

Selecting the HTML format is a safeguard in case Evernote ceases to exist. The alternate option is to save them as “Evernote XML Format (.enex)”, which is an Evernote-specific file format which saves more metadata about each note (e.g., notebooks, tags, author), so this choice could be useful if you ever need to restore lost notes into Evernote (i.e., if their sync ever messes up). The downside to .enex is that it’s not a universally-friendly file format, so it wouldn’t do you much good if Evernote ever goes kaput.

p.s., an added benefit of backing your notebooks up in HTML format is that you can easily go back and retrieve a previous version of any single note without affecting all of your Evernote notebooks (which would be the case if you didn’t select “HTML” in step 3.

You can learn about Corbin’s digital marketing business at corbin-dodge.com and read about his adventures renovating his 100+ year home at eastwoodbungalow.com. Thank you, Corbin!


Filed Under: Genealogy tips, Technology Tagged With: Evernote, genealogy tools, organizing aids, technology

How I process a downloaded document

October 20, 2017 By Janine Adams 14 Comments

Last March, I wrote a post called My digital workflow that detailed what I do with a document I find on the Internet. (I never print it.) My digital workflow has not changed since then and it’s working out really well for me.

Last weekend, I did a talk at the St. Louis Genealogy Conference about going paperless and in my Powerpoint I included screenshots of the digital workflow and also a summary slide. The attendees asked for copies of the summary slide, so I decided to post it here.

The process is basically the same as my March post but I switched up the steps a little.

The example I used in my talk was my father’s uncle, Jay Ellis Adams (1914-2004). I had found his obituary online at the newspaper’s website. Here’s the workflow:

1. I click Print and, in the printer dialog box, Open in Preview (my Mac’s default pdf reader), which downloads the document to my computer. (If it had been a document at Ancestry, I would have clicked Save, then Save to My Computer.)

2. I immediately rename the file, using my file-naming protocol, which is Date Type of Document-Ancestor Name-Locality. I stick it into my Surnames folder, as a temporary holding place until I file it in step 6. I know that any unfiled documents in the Surnames folder require processing.


3. I select a fact from the document, add it to Reunion and create a source citation for it.


4. In Reunion, I click the Preview tab in the source record and then click Copy Source. (For the eagle-eyes among you, I originally found a transcript at Genealogy Bank and used that as the source citation. Then I decided to go to the newspaper’s website and download it from there, so I changed the source citation. But I was too lazy to take a new screenshot.)

5. I paste the source citation into the metadata of the source document (the obituary) by Ctrl-clicking on the file and selecting Get Info from the menu that appears, then pasting into the Comments area.


6. Then I file the document into my folder structure. My folder structure for collateral relatives is Genealogy/Surnames/Collateral/[Surname]/[Name of Ancestor (YOB-YOD)]. If the document  applies to multiple people, I duplicate it for each person and then drag it into the appropriate folder for each person. But I don’t take the trouble to rename it.

7. The final step is to drag the document into the Multimedia area of the source record in Reunion. This creates a link to the document so that I can open it up inside Reunion, which is very handy.


From there, I continue to extract information from the source document and add that it to Reunion. Every piece of information I glean from a single source document uses the same source number, no matter what person it applies to.

Here’s the summary slide:

This is the way I do and it works well for me. Of course, it’s not the only way to do it or perhaps the best way to do it. But I’m hoping you’ll find it useful to see my workflow. I’ve been processing documents this way for almost a year now and it’s working very well.

For more in-depth information on how I organize my own genealogy, check out How I Do It: A Professional Organizer’s Genealogy Workflow, a 37-page downloadable pdf available for $19.99.

Filed Under: Challenges, My family, Organizing, Technology Tagged With: Adams, electronic files, organizing aids, record keeping, source documentation

Using the card catalog to find elusive documents on Family Search

September 22, 2017 By Janine Adams 6 Comments

Using the card catalog at Family SearchI use both Ancestry and Family Search regularly for online research. I tend to start with Ancestry because I find it easier to find indexed documents there. But when I’m looking for a document that’s more elusive, the catalog at Family Search often comes through for me.

I will sometimes do a Records search on Family Search but most often I start with a card catalog search. And I frequently come up with some great results.

I’ll give you a real-life example. I was doing research yesterday at the Saint Louis County Library and found an index to a Will Book. I wanted to see if I could find the actual document it referenced (an 1843 will for my 5th great grandfather, Jacob S. Baker, 1766-1845). Here’s what I did:

  1. I went to www.familysearch.org and logged in, then clicked Search, then Catalog.
  2. Under Place, I filled in the location from biggest to smallest (i.e. United States, Kentucky, Muhlenberg) then clicked Search.
  3. In the search results, I clicked on the type of document I wanted, in this case Court Records.
  4. In those search results, I clicked on a collection called Court Orders, 1799-1912.
  5. When I scrolled down under Film Notes, I was delighted to see that of the 12 rolls of microfilm, two had been digitized. And the year I was interested in was on one of those two rolls. (It seems like that never happens!)
  6. I clicked on the little camera icon, which opened the images of the film reel. And just as though I were using a microfilm reader, I was able to find the document I was looking for, based on the information in the index. Hooray!

If I had simply done a Records search on Jacob S. Baker I would not have found this image. (This is another argument for getting away from my computer and going to a library or other repository.)

Here’s another way the a Catalog search can be helpful. Sometimes at Family Search, you can do a Records search and find an entry that doesn’t have an image. But that image may indeed be available, with a Catalog search.

For example, I was looking for the death certificate for the second wife of my 2nd great grandfather, George Washington Adams. Her name was Della or Idella Adams and she died in Olympia, Washington, in 1943. On Family Search, through a Records search, I found an entry for her death certificate in the collection Washington Death Certificates, 1907-1960. But there was the dreaded “No image available” message.

But I didn’t give up. Instead, I copied the GS Film Number (2024117) and started a new search, this time of the Catalog. I pasted the film number in the box that says Search For Film/Fiche Number. (When I entered location as well, it didn’t produce results, so I deleted the location and left just the film number.)

That gave me a link to the whole collection of Washington state death certificates. I clicked on film number 2024117, even though its description didn’t seem to fit the county I was looking for. Then I went to the index record I’d found in the Record search and looked for the image number, 2348. I simply entered that number at the top of the screen for microfilm roll number 2024117 and it took me right to an image of Della’s death certificate.

I love searching the catalog at Family Search. I know a catalog search is an option at Ancestry, too, but I find it less enjoyable and productive.

Next time you can’t find an image of a document you have some information for, I heartily suggest using the catalog!

Filed Under: Challenges, Genealogy tips, Technology Tagged With: Adams, excitement, family search, genealogy tools, research, resources, technology

Creating a quickbar button in Reunion

September 12, 2017 By Janine Adams 12 Comments

Creating a quickbar button shortcut in ReunionI use Reunion on my Mac to keep track of my family tree. It’s the only software I’ve used, so I don’t have a basis of comparison, but I really like it.

My default view is the Family View and when I open the program, it starts at the base of the tree, with the records for my husband and me. At a session at the Midwestern Roots conference last year, I learned about creating a shortcut so that I can easily click on a person from anywhere on my tree to access their record. Reunion calls the area at the top of the screen the quickbar and it calls the individual name you put there a quickbar button.

I created quickbar buttons for my three ancestors for whom I have Civil War pension files because I access them a lot. I also added one for my great grandfather’s half-brother, Wayne Horace Adams (1907-1976), because otherwise to get to him, I have to first click on the red arrow to access his mother (his father’s second wife), which is a tiny hassle. (This year I’ve been trying to figure out Horace’s late childhood/early adulthood, so I’ve been spending time with him.) Click on the picture at the top of this post to see a larger photo of my opening Family View screen with the quickbar buttons at the top. (To protect my husband’s privacy, I blurred out his info and our marriage date.)

It’s extremely easy to add a quickbar button. Within the Family View just click on the person in question and drag him/her to the quickbar at the top of the screen. Reunion will ask you to give the quickbar button a name. To remove it, just drag it to the trashcan icon on the Mac. You can also click the little pencil icon on the far left of the quickbar to edit the buttons on it. And if you click the question mark icon you see in that edit menu, you’ll get lots more information on the quickbar.

I have found this to be so helpful, especially since I’m focusing on one family line this year. My great great grandfather G.W. Adams is the nexus of my research this year, so I click on his name pretty much every session. It’s really nice not to have to click my way up my tree to him!

Filed Under: Genealogy tips, Technology Tagged With: genealogy tools, Reunion, software

  • « Go to Previous Page
  • Page 1
  • Interim pages omitted …
  • Page 11
  • Page 12
  • Page 13
  • Page 14
  • Page 15
  • Interim pages omitted …
  • Page 27
  • Go to Next Page »

about me

I'm Janine Adams, a professional organizer and a genealogy enthusiast. I love doing family history research, but I find it's very easy for me to get overwhelmed and not know where to turn next. So I'm working hard to stay organized and feel in control as I grow my family tree.

In this blog, I share my discoveries and explorations, along with my organizing challenges (and solutions). I hope by sharing what I learn along the way I'll be able to help you stay focused and have fun while you do your research, too.

tags

30 x 30 Adams amy johnson crow anniversary Brown cemetery census Civil War conferences connections dna electronic files Evernote excitement Family Curator family photos genealogy tools getting started goals How They Do It Igleheart Jeffries keepsakes learning opportunities maps newspapers NGS organizing aids overwhelm paper files planning quick tips rasco record keeping research research log research trip resources RootsTech social history source documentation Stacy Julian technology time management vital records

join the facebook community!

join the facebook community!

My organizing business

Learn more about my organizing business, Peace of Mind Organizing®.

Subscribe by RSS

  • RSS - Posts
  • RSS - Comments

© 2026 Janine Adams


Loading Comments...